
Being stuck at home with no where to go has resulted in some craftiness around here. I always enjoy finding a second life for items that I don’t use so this project was actually pretty perfect.
My four year old daughter has had the hardest time getting to her clothes in her closet. She could reach the first two shelves but then couldn’t really reach any higher. She was always worried they would fall on her so she would ask for help every day to get dressed.
She had recently gotten a daybed but we don’t have a floor bed to go with it so it is really just a tall twin bed. I wanted to figure something that would fit under her bed that would work to hold her clothes. I had a garage full of milk crates from a produce co-op that I co-run so I grabbed a few of those and slid them under her bed, just to make sure they were the right height. They were actually pretty perfect. I figured out that I could fit five to six of them in a row under her bed which was the perfect number for all of her clothes that didn’t need hanging.
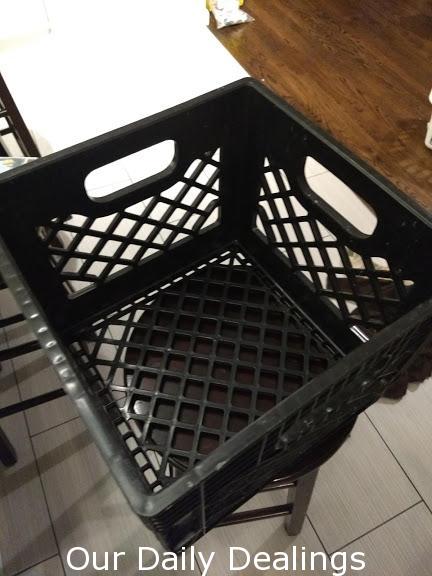
The milk crates, however were black and pretty grungy. They would not go well in a princesses room, my daughter informed me. What was I going to do? The crates fit perfect but they were ugly. I went to my craft room and began looking at material. I found some princess material and decided I would measure the crate and make coverings for the crate from the material. Well…not every project works out as you hope. The material had no give to it and after being sewn together, it would not stretch over the crate properly.
Now what? I needed a Plan B. I went back down to my craft room and kept brainstorming. I found a bag of wool sweaters I was originally planning to use for cloth diapers and never got around to making. I grabbed a sweater and took it upstairs to my crate and slid it over.
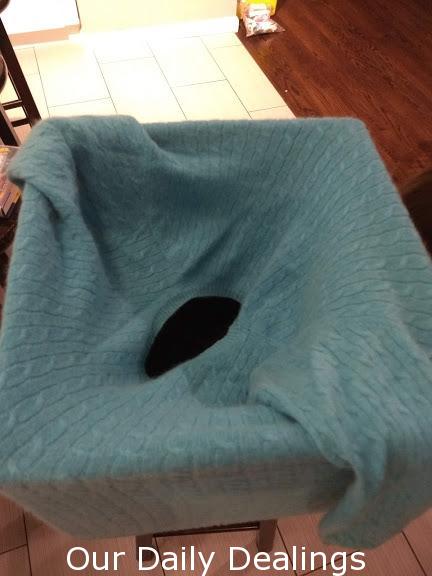
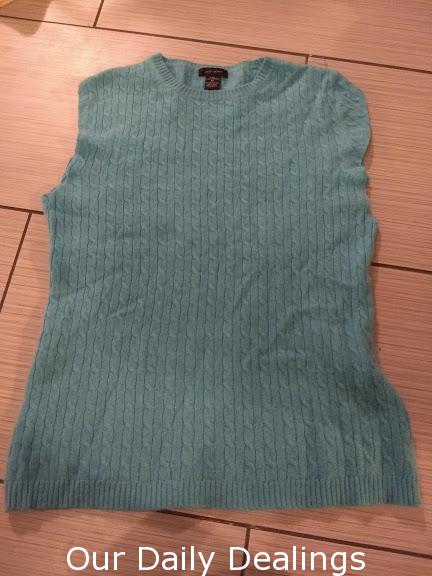
I knew this idea would work. The great thing about sweaters is they are so nice and stretchy so they would be forgiving in the sewing aspect. Now that I had a vision, I laid my sweater out on the floor so I could visualize how I needed to modify it to make it a square covering.

The arms needed to go for sure and I needed to square off the top. I didn’t get a picture, but I cut the top of the sweater off at the front neck line which was the perfect measurement for the crate.
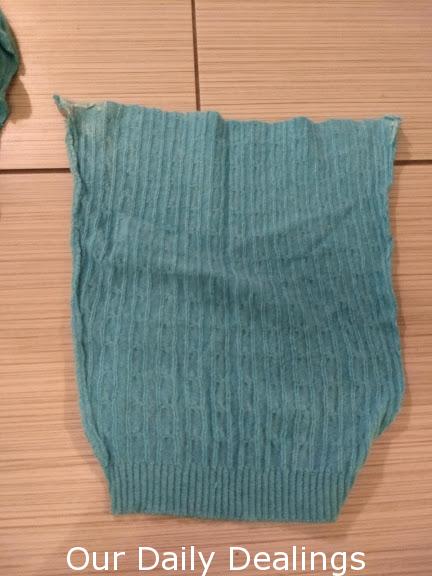
Now the sweater would cover inside and outside of the crate sides (this crate had 13″ walls so my measurement was 26″). I still needed a bottom for the inside of the crate. I decided to open up one of the sleeves and see what kind of measurement I would get. Wouldn’t you know, it was almost perfect with just a little stretch needed on one side to fit the base of the bucket perfectly. I trimmed it to the measurement I needed (the 13″ square).
Now, I was ready to head to my sewing machine and put the pieces together. I used the seems of the sweater as two of the corners for the crate which made my measurement easier. Then I pinned half way between the seems on both sides as my third and fourth side for the crate. The sweater sleeve, or my base piece, had four corners so I lined up one corner with one corner piece on my sweater. I sewed, fabric right sides together, corner to corner all the way around, pulling as much as I could on the slightly shorter side so that it stretched to fit the measurement I needed it to to complete the side’s stitches.
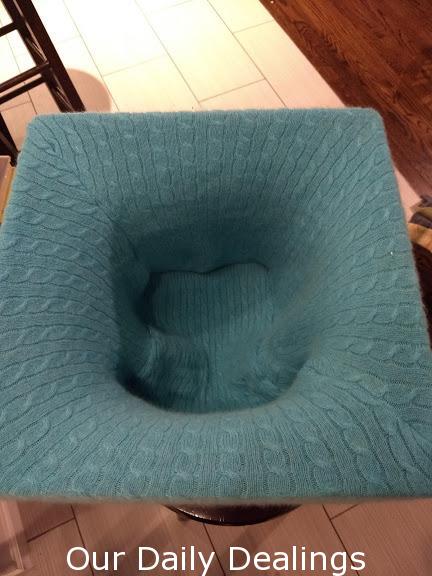
Once I was done stitching all the way around my four sides, I turned it right side out and fit it over my crate. It still needed a bit of modifications to form a perfect fit. It needed to be pulled in the corners to fit more snugly.
I grabbed cream colored yarn that was sitting near me and a yarn needle and started pulling the sweater to the bottom of the crate so that it would stay in place and not creep up the crate with a little pressure. This also worked as a castor for the bottom the crate to not scratch up my wood floors.
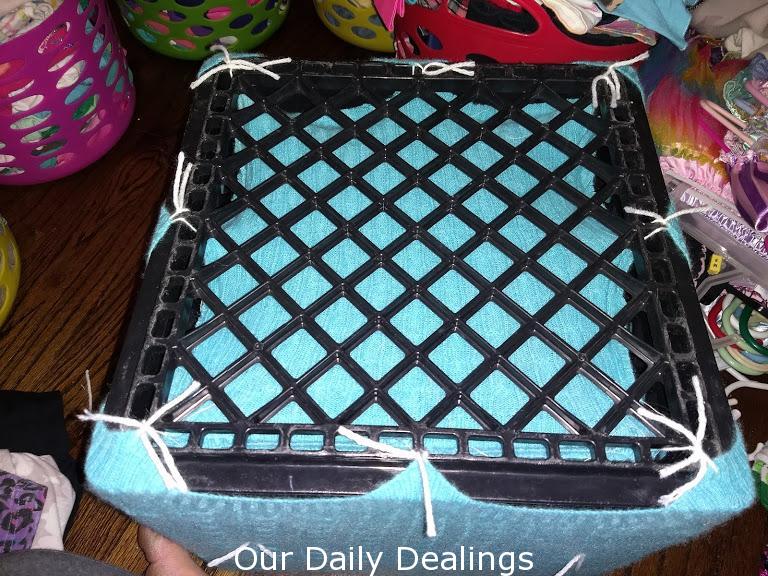
Next step was to put a couple little ties in the sides all around so that it would not give too much in the centers on the inside to make a better fit for the items going in the crates.

Here is the final results. It still appears to pull in slightly inside the crate but with the items going inside it, it would smooth it out nicely. That is one of the benefits of a stretchy material, it is very forgiving.
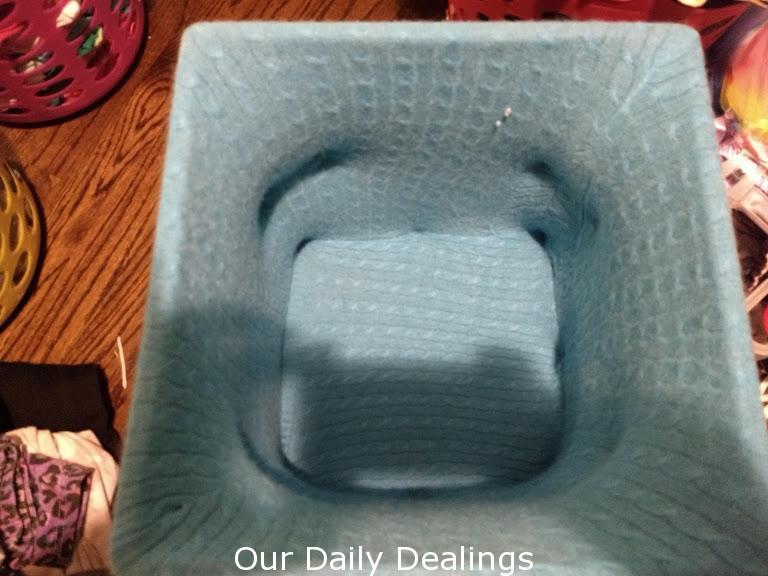
We finally were able to add her clothes and the results were so very cute! I repeated this process five more times to complete all the crates needed for her clothing. All of the sweaters were a little different in color and design but they all blended well in her colorful room and she was so excited about the final look. No more ugly, black crates. Now, she had pretty and functional clothes bins under her bed that she could access easily, without worry of dropping them on her head.

What do you think of this project? Did you like my idea? Have you done anything similar? I would love to hear from you in the comments!